
I’m starting to have to look up the Roman numerals, I had no idea it would take some many posts to cover the project when I started. The project is, however, moving along and we’ve reached the finishing stage.
I’m going to use milk paint to finish the outside of the chest. Chris Schwarz has been touting the virtues of paint finishes for tool chests for some time and I think I’m starting to buy into it. For one, this is a workshop piece and it’s likely going to receive dings, nicks and dents regularly. While this would quickly turn a film finish into garbage I actually think it will give the painted finish some character. When there are too many dings and dents it can quickly be repaired with a fresh coat of paint. If I don’t end up loving the finish I can always repaint it. Finally, these chests were traditionally painted and likely for many of the above reasons. Since we’ve more or less been sticking to tradition with the joinery, hand tools and hardware, why divert from it now?


I’m going to try a type of paint that I haven’t used before, milk paint. Milk paint has a long and interesting history, which appears to be mixed with a lot of misinformation. To satisfy my own curiosity about milk paint and what it exactly is I started to do some research, the usual initial Wikipedia and google searches didn’t yield too much beyond a few basics and a lot of advertisements. But I dug deeper… and deeper, and eventually came across this treasure trove of information. In order to get back to the tool chest and get some paint on it, I’ll just hit a few of the highlights and put up a more comprehensive distillation of my milk paint research another time.
Milk paint, also known as casein (proteins common to milk) paint is traditionally made from a few simple and natural ingredients. These are: milk (casein), lime, chalk (whitener) and/or pigments for color. Its popularity in the United States seems to be correlated to a French Chemist, Cadet de Vaux, who published a recipe for milk paint in his 1801 book “Memoire”. This was translated to English and published in London as “The Repertory of Arts and Manufactures,” and after that, the recipe was popping up everywhere. Suzzane Ellison has a brief history of milk paint, here on the Lost Art Press blog. After revisiting this post by Suzzane, I’ve also realized there’s a plethora of more information from readers in the comments. If I ever get some free time I’ll have to investigate them a bit more thoroughly.

For the chest, I’m going to use milk paint from the Old Fashioned Milk Paint Company. I’ve deliberated the color quite a bit, but I do have a plan. I’m going to do a base coat of “Barn Red” and then cover that with “Soldier Blue”, the goal will be to have the red visible through the blue as the chest is warn and used. I also picked up some black incase I don’t like the way it turns out, because I do like the looks of the black painted chests I’ve seen. On the suggestions of Chris Schwarz, I threw out the directions included with the paint and shook up a 1:1 paint powder to water ratio in a mason jar. It was first thing in the morning and I was measuring the ratios out in the kitchen. I started shaking the mixture and the entire jar went flying out of my hands, in the kitchen! And in prefect timing Bela brought in a gift for us of a bird she caught. Needless to say we were both quickly banished to the backyard. After that is, I cleaned up the incredible mess I made.


The first coat of red want on quite well. I brushed on thin coat and the pine is already taking the color well. I like it. I lightly sanded after the first coat using 320 grit paper because the water based mile paint raises the grain of the wood. It was just another reminder of how much I dislike sanding, but it did go quickly. I will, however have to sand after every coat…

The second coat looks quite good. You can start to see some of the chalky texture that milk paint is known for.

Why I like the red, it’s time to try out the blue and see how it looks.


After the second coat of blue I wasn’t convinced this was the right color for the chest. It’s just a bit to pale and gray, I’m aiming for something with more depth. So I’m going to go back to the red, I really liked the way it was looking. And as an added bonus I will still get a bit of the effect I was hoping for by using two colors. Now as the top red coat gets rubbed through with use you’ll be able to see the blue beneath!

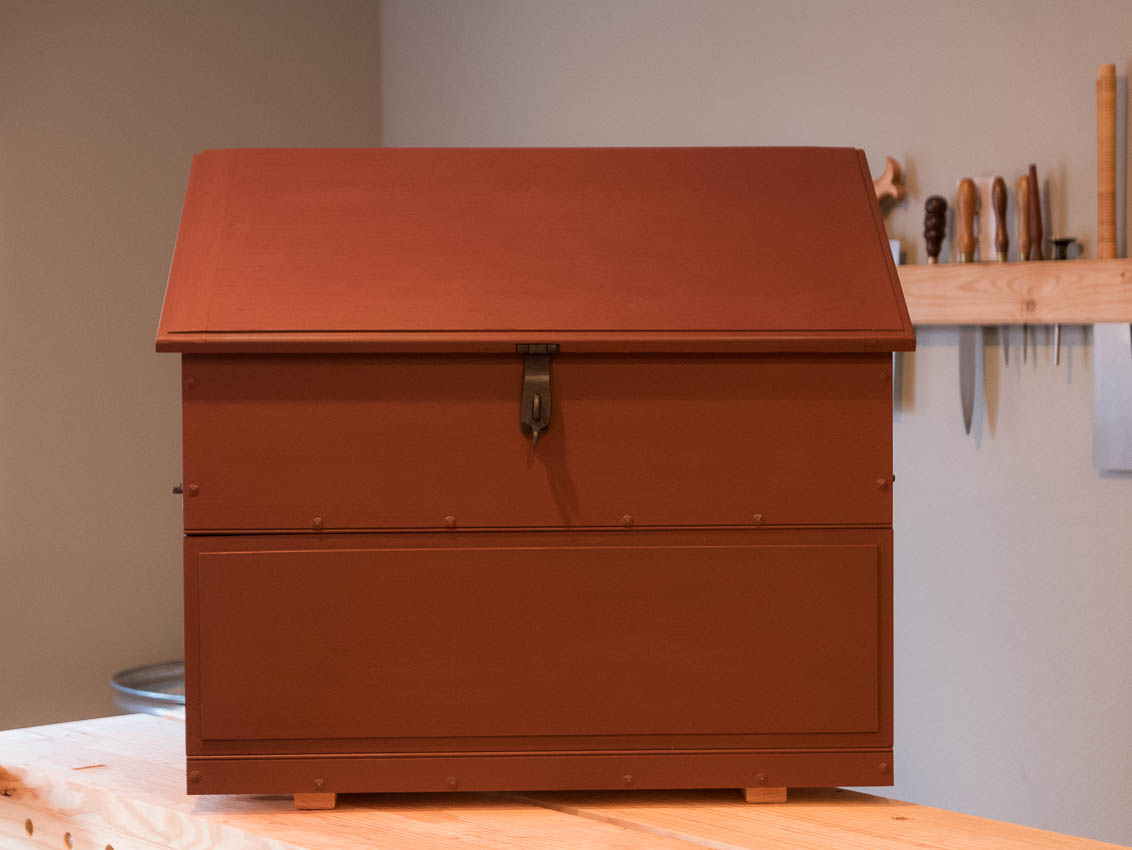
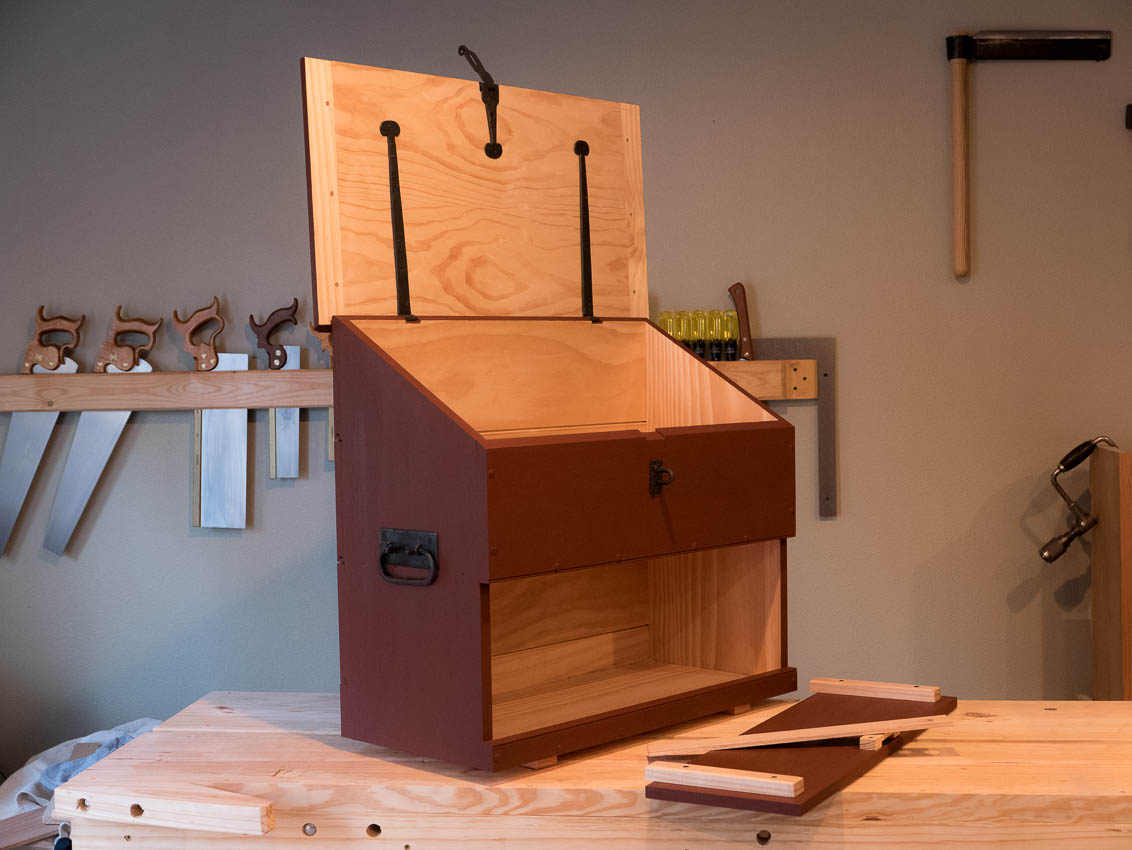
After two more coats of red, a buffing with some brown paper, and light coat of boiled linseed oil, we have the finished product (for now)! I’m really happy with how this turned out. Here’s a few photos of the fully painted chest with the gorgeous hardware from John Switzer of the Black Bear Forge installed.


Previous posts on the Dutch Tool Chest Build can be found here:
Hahahahaha!!! Banished! Sorry to hear about the accident but that is such a funny story!!!!
Hahahaha! That is too funny!! Sorry about the spilled paint though. The chest looks awesome!